The default commenting system in WordPress is nice, simple, and intuitive. It enables anyone to leave a remark on your website, allowing readers to leave comments on any of your articles by providing their email address and name. They can even include the URL of their website in the remark area.
However, because comment boxes are so simple, spambots and scripts may simply abuse them by leaving arbitrary comments on hundreds of WordPress websites in an effort to get backlinks to those websites. Yes, you may use plugins like Akismet, Google Captcha, Growmap Anti Spambot Plugins, and others to prevent comment spam. However, these plugins either don’t shield you from all types of comments or make it difficult for devoted readers to leave comments by including difficult verification boxes.

So ultimately, the situation either remains as it is or become even more worse.
To handle this, it might be wise to utilize a new, more potent commenting system. Disqus Comment System is the most potent tool among all the WordPress improved commenting systems.

So, if you want to migrate to disqus comment system for your website, this article is a comprehensive step-by-step guide for you. Follow these steps to integrate disqus comment system with your website:
1. Install the Disqus plugin.
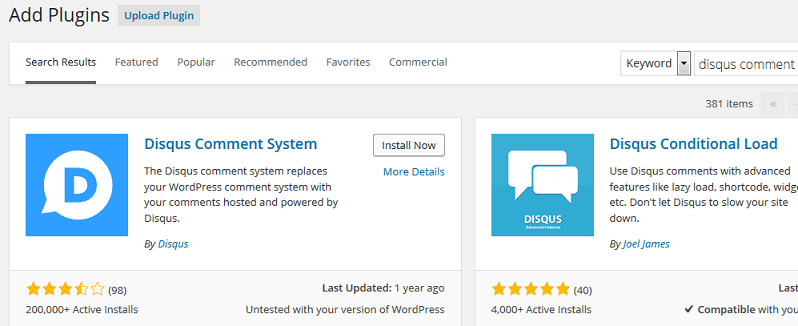
The first and foremost step to integrate disqus with your website is to install and activate Disqus Comment System on your WordPress website. You can do so by using any of these two methods:
- From your WordPress dashboard, navigate to Plugins >> Add New and Search Disqus Comment System. Click “Install Now” link below the plugin and then “Activate Plugin” on the Plugin Installation Page.
- The Disqus Comment System WordPress Plugin may be downloaded from the WordPress Plugin Library here. Then, upload the plugin’s zip file to wp-content>>plugins, unzip it from the plugin folder, and activate it using the WordPress Dashboard’s Plugins >> Installed Plugin location.
2. Create Account on Disqus
Proceed to Comments >> Disqus from your WordPress Dashboard now. As you can see, in order to utilize the plugin, Disqus requires your username and password. Thus, to establish an account on Disqus, complete these steps:
- Go to Disqus.com and select the top-right “Add Disqus to My Website” option.
- On the registration page, choose unique username, add password and click on “Next Step” button (bottom-right)
- On the next step, add your site name, unique URL (shortname), choose category of your website and click on “Finish Registration” button (bottom-right).
- After logging into your WordPress account using Disqus, choose “WordPress” as the platform for your website in the next step and click “Verify” at the bottom.
3. Building Up Disqus for Your Website
At Disqus settings page on your WordPress dashboard (Comments >> Disqus), click on “Plugin Settings”. On the general section, add shortname you have used while registering your website. Now, scroll down to “Advanced” section where you need to insert API Keys (Public API & Secret API) to finish integration.

So, you have completed all your setup task for integrating Disqus Comments. Finally, navigate to Comments >> Disqus >> Plugins Settings. Scroll down and under “Import and Export” section, click Export Comments buttons. Now, all your existing comments will be replaced from default commenting system to Disqus and you have Disqus Comments instead of WordPress native comment system now.

